How many solar panels do I need? How big should my solar energy system be?
These are among the first questions homeowners ask when they’re ready to go solar in an effort to reduce their electricity cost and gain some independence from the utility.
Figuring out how to size a solar electric system for your property requires looking at a number of factors. The factors are generally the same whether you purchase the system with cash, finance it with a bank or solar loan, or sign a lease or Purchase Power Agreement (PPA) in which someone else owns the system but you benefit from the lower-cost electricity it produces. (Read more about the four ways to pay for solar on our Learn page.)
Your solar installation company will design and size your solar electric system for you, of course, using their energy engineering expertise and tools. But in the meantime, we’ll explain the factors that impact what size – how many watts and how many panels – your home will need. And we’ll take you through the steps for solar system sizing, so you can get a rough idea on your own of what size system you might need.
We’ll cover:
Two Ways to Size a Solar System- Option A - Start with Your Electricity Needs & Goals
- Step 1 - Evaluate your home’s current and future annual electricity needs.
- Step 2 - Identify your energy and financial goals.
- Step 3 - Evaluate and measure your roof.
- Step 4 – Draw a rough design to estimate number of panels.
- Step 5 – Take visual considerations into account.
- Step 6 – Factor in price and adjust size if needed.
- Option B - Start with Your Available Roof Space
Two Ways to Size a Solar System
Theoretically, there are two ways to determine what size solar energy system is best for your roof:
- Size your system so it produces the amount of electricity needed to cover the desired amount of your electric bills.
- Size the system based on how many panels can fit on your roof.
The second approach is less common because it doesn’t get to the heart of why most people go solar: to address high energy bills. Most people want to install the right sized system, not the absolute biggest. Still, we’ll explain how you might approach the question using that method in the second half of this article.
But first, we’ll take you through the Approach A for sizing a solar system. This is the method used by most solar professionals like those at Citadel Roofing & Solar.
Option A for Sizing A Solar Electric System: Start with Your Electricity Needs & Goals
Following are explanations of the six steps for sizing solar this way.
Step 1 - Evaluate your home’s current and future annual energy needs.
Current Needs
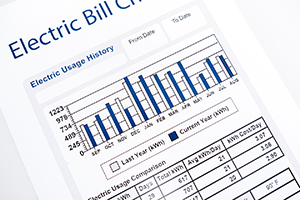
Start by determining your energy consumption -- how much electricity your family uses in a year. This can be found on your utility bills. Each monthly bill lists the kilowatt-hours (kWh) of electricity you bought from the utility for that time period.
Some utilities also provide a running total for the year-to-date or the past twelve months, so you don’t even have to do the math and add up your last year’s worth of bills.
It’s important to know your actual full year’s electricity usage for the most accurate photovoltaic (PV) system sizing, because your usage probably fluctuates month to month - based mainly on weather, but also possibly your lifestyle. For example, you may be away every August. So don’t simply multiply one month’s usage times twelve – that will likely overestimate or underestimate your true electricity usage. Get the real number for the previous year or a typical year.
Future Needs
In addition to your home’s current energy needs, also consider your future electricity usage at this point. Your electricity “demand” or needs will go up if you plan to switch to an electric car, air-source heat pump, heat pump water heater, electric clothes dryer or induction stove in the near future. (Read more on the electrification of California homes here.)
A solar or energy pro can give you some idea how much electricity those vehicles and appliances take to run, and how much that affects your overall energy usage. How much they change your overall electricity usage depends on what they are replacing, e.g. a gas-fired burner, a propane-fueled water heater, an outdated electric water heater, a gas stove, a conventional electric stove, etc.
Energy Storage
More and more Californians also are sizing their solar panel arrays to accommodate solar energy storage systems, usually installed at the same time as the solar although they can also be added later. You want to produce enough solar to charge those batteries so you have ample energy stored when you want to draw from them, either during a power outage or at night when your solar isn’t producing electricity.
Step 2 - Identify your energy and financial goals: How much utility electricity do you want to replace with solar, and by how much do you want to reduce your electric bills ideally?
Next, you need to decide how much of the utility’s power you want to replace with your own clean solar. This is a personal choice usually driven by finances. Some people think in percentages, with a goal of reducing their bill by, say, 15% or 50%. And some think in dollars, with a goal of getting the monthly bill under $100.
Most people start with the goal of covering their entire electric bill. But bigger systems cost more upfront. On the upside, they also offset more of your utility bill and deliver even greater savings over time.
For many Californians, their roofs just aren’t big enough to accommodate the number of panels needed to offset 100% of their electric bills.
Regardless of how you approach your energy reduction and savings goals, this is the only time in life when a higher utility electric rate is a good thing. That’s because the higher the utility’s rate, the more value you get from your solar and the greater your savings.
Step 3 - Evaluate your roof space to find the largest, most open, least obstructed, least shaded and sunniest section. Then take approximate measurements.
Now that you have a handle on your energy consumption, and how much of that you’d like to cover with solar, look at how much roof space you have available for your solar panel system.
Identify the roof sections that get sunlight during peak hours of the day, and the one section that gets the most sun in the entire course of the day. If you’ve never paid attention to this, take a day to watch how the sun moves across your roof. (The sun’s pattern changes with the seasons; this is taken into account by the software used by professional solar designers.)
California Solar
As California is in the northern hemisphere, the best roof is most likely going to be the one that faces east, southeast, south, southwest or west. (As to which direction is best for solar, it depends on if you want maximum solar production or maximum savings, due to California’s time-of-use rates; that’s a rabbit hole we won’t go down in this article, but you can read more about how time-of-use rates work here.)
Roof Obstructions
In a perfect world, the section of roof you choose will be free of dormers, chimneys, vent pipes and skylights, all of which take up roof space and will reduce the number of panels you can install. Some homeowners actually remove skylights or move vent pipes when going solar for that reason. But if your roof has some of those features, don’t worry. Installers work around them every day.
Do note, however, that shade on the panels – not only from trees but also from dormers and chimneys - may reduce your system’s output, so that may mean a larger system is needed to meet your energy goals. Today’s technology has greatly minimized the impact of shade on the entire system’s ability to produce electricity. But there is still an impact. It’s sun, not shade, after all, that converts into energy.
Get Measuring
Take a rough measurement of the width and height of the available space on your chosen section of roof. Please don’t pull out a ladder and climb up on top of your house with a measuring tape to do this. You can get decent measurements from the ground, or go onto Google Maps or another online map application and refer to the little ruler in the corner to determine what scale is used on the map. You can then correlate your roof in the image to real life using the scale.
Once you know the length and width of the roof section, multiply those to get the square footage. So a 25’ x 30’ section of roof has 750 square feet of space. You can’t install panels right to the roof edges, though, so trim a little off that number.
The image to the right shows one way NOT to lay out panels. The panels extending beyond the top of the roof’s peak are unsightly and unsafe, exposed to wind gusts and not fully supported. In fact, such an installation wouldn’t even be allowed in California anymore due to setback requirements established for fire safety.
You’ll also want to trim a little off the total square footage to account for dormers and other obstructions. For the purposes of this example, let’s say you end up with 700 square feet of useable space.
Roof Condition
As a side note, your roof’s condition will also need to be evaluated at some point, but that doesn’t affect the size of your solar energy system. There’s no point putting shiny new solar panels on a roof that will need replacement or repair soon. In fact, some installers will refuse to do so, considering it poor business practice that is not in the homeowner’s best interests.
Step 4 – Time for some math and some drawing: Based on the square footage of your roof space and the size of the PV panels, draw a rough design to estimate how many panels you can fit on your roof.
Now it’s time to get a rough idea how many panels can fit on that roof section.
Residential PV panel measurements refer to a number of characteristics, including:
- Wattage, which is like the strength or ability to convert sunlight into energy; today’s range is around 300 to 400 watts for home solar arrays.
- The number of photovoltaic cells they contain; 60 or 66 is typical for a residential solar panel, 72 or 96 is more common with commercial installations.
- Their actual dimensions; 66” x 39” is typical for a residential panel but there are variations. Converted to feet, that comes out to 5.5’ x 3.25’.
Wattage is key for determining how much power your system can produce and therefore how much of your electric bill it can cover. That’s a critical piece of sizing the system correctly. We’ll be honest, you really need to turn to a solar pro for that complex calculation, which requires feeding in a number of variables.
It’s the third measurement – dimensions – that we’ll worry about now, as we try to estimate a PV system size.
(If you know which brand of solar panels you want, you can probably find their dimensions online and use those. Just be sure the length and width reflect the entire panel, including the frame.)
Do The Math
So, if your solar panels are 5.5’ x 3.25’ that comes out to 17.875 square feet of roof space needed for each panel. Theoretically, that means you can fit 39 panels on your 700-square-foot roof section because 700 divided by 17.875 is 39. In reality, the number will be much less. The number of panels you can fit is constrained by how many rectangular panels will actually fit into the space in logical rows and columns. You also want a layout that is safe and minimizes the impact of any obstructions and shade.

If you’re good with graph paper or online drawing tools, this is the time to pull them out and sketch out how you would fit solar panels onto your roof based on the panel’s and your roof’s measurements. The rectangular panels can be installed in either direction – horizontal or vertical, also known as portrait and landscape. So you can try laying out a system with panels one way first, and then the other. You can even mix and match if you’re so inclined.
As we said above, solar panels come in different strengths or wattages. So if your roof can’t fit as many panels as you’d like, to cover as much of your bill as you’d like, you may be able to switch to a higher-wattage panel. That panel will produce more electricity per square foot and get you closer, or even all the way, to your energy goal.
And if your roof can fit more panels than you need, you can reduce the number of panels and/or choose a lower-wattage and lower-cost panel to save some money.
How to Define System Size
By the way, solar system size is more often referred to by total wattage rather than number of panels. A system with 20 panels of 325 watts each is a 6,500-watt system, also known as a 6.5-kilowatt system.
Step 5 – Take visual considerations into account. Adjust your design based on how you want the system to look, i.e. all panels in portrait or landscape orientation, or one big rectangle with no outliers.
Now that you know about how many panels will fit on your roof, it’s time to consider aesthetics. Curb appeal is very important to most homeowners. A home is probably our most expensive and valuable possession, and the solar energy system will be on it for decades. We want it to look great.
For some homeowners, that means dropping a few panels. Sure, the designer could squeeze in another row but in horizontal orientation rather than vertical like the other rows. The homeowner desiring maximum solar production will go for the two orientations. The homeowner who is balancing production with aesthetics may opt for all panels oriented the same.
Or maybe the roof allows for one or two more panels at the end of the larger group of panels, or on a small section of roof like the one over the doorway in this photo. Again, it’s a trade-off between more solar production and electricity savings vs. one neat rectangle of smaller rectangular panels.
In the end, it’s the homeowner’s choice. Any installer who tries to force a system design on you is not one you want to do business with.
Step 6 – Solar system price is the final piece of the equation. Factor in the cost as well as how many panels you can fit onto your roof, and how many you want to fit onto your roof to offset the desired amount of your annual electricity usage.
Finally, it’s time to incorporate the price of the system into the equation. If the price tag is in your ballpark, great! But if it’s more than you are comfortable with, you may opt for a smaller system with less production. (Or, you could finance the system with a loan, or opt for a lease arrangement where a third-party pays for the system while you get some of the electricity savings. Read more about How to Pay for Home Solar or Energy Storage here.
Of course it’s also possible that your roof will hold more panels than you need, especially if your electricity usage and bills are on the low side.
You really can’t price out a system without the help of a professional solar installer, however, in part because the price encompasses much more than the panels. It also covers all other equipment from the all-important inverters to the smallest screw. It covers all of the substantial administrative costs related to city/town and utility permits, commissioning, inspections and approvals. And it includes labor costs and warranties.
In Summary
That’s it! To summarize the steps in sizing your solar electric system:
- Determine your electricity usage and expense.
- Decide how much of that you’d like to offset with solar.
- Evaluate and measure your roof.
- Figure out how many panels will fit and if that’s enough, too much or too little for your needs. Adjust the number of panels if needed.
- Make any changes to your layout and the number of panels based on how you want the system to look.
- Factor in system price and finalize the number of panels.
Option B for Sizing A Solar Electric System: Start with Your Available Roof Space
Wait, we’re not done yet! We promised to tell you about the method of sizing a solar system that starts with your available roof space. As you’re probably guessing, this is really just a variation of the first method outlined above.
But if your goal is to produce as much electricity as possible, it can make sense to start by figuring out what your roof can accommodate.
Reasons for Maxing Out Roof Space
Why would someone want to capture every possible photon the sun delivers? There are quite a few reasons, actually. They include:
- You have an exorbitant monthly bill from the utility and you know you’ll never cover it all with solar. So you want to replace as much as possible with your own lower-cost solar electricity.
- You don’t mind producing more than you need because you know the extra goes into the grid for others to use, while helping the environment by offsetting fossil-fuel use. (The utility may give you some “credit” for energy you send them, through California’s net metering program.)
- You know your electric bills are going up soon because you plan to switch to electric cars and energy-efficient appliances such as air-source heat pumps, heat pump water heaters or induction stoves. (Read more on the electrification of California homes here.)
- You are installing a battery backup or energy storage system and want to make as much solar as possible to charge those batteries.
If one of these describes you, you’ll want to maximize your roof space and install the biggest possible system.
With this method for sizing a system, you can skip most of the six steps described above and focus on Steps 3 and 4:
- Evaluate and measure your roof.
- Figure out how many panels will fit.
Let the Experts Do It
If you actually sized out a system following these steps, we hope you found the exercise fun. If you merely wanted to understand how a solar energy system is sized, we hope you found this article educational.
Eventually you’ll want a solar professional to evaluate your roof, your energy needs and financial goals, and a professional designer to size and lay out the system. With your input, the experts should deliver the right system design and size for your needs.